My Life OS in Obsidian - Part 5: Homebase & Areas
Unlock the door to a balanced life using the powerful Wheel of Life tool to guide you. Discover your unique life dimensions through self-reflection, personal values and roles. Visualize your balance with a personalized wheel, paving the way for improvement. Dive into the Obsidian Setup and learn how to create your Homebase and your life Areas.
Welcome to the fifth part of the Life OS Series. In this article I'm going to describe the Homebase and Areas.
Life OS Series (Click to Expand)
The Wheel of Life
Introduction
Life is a journey filled with twists, turns, and unexpected detours. Just like a wheel that keeps on turning, our lives are comprised of various interconnected aspects that contribute to our overall well-being and satisfaction. The Wheel of Life, a powerful coaching and self-assessment tool, provides a holistic view of these different dimensions.
Discover Your Life Areas
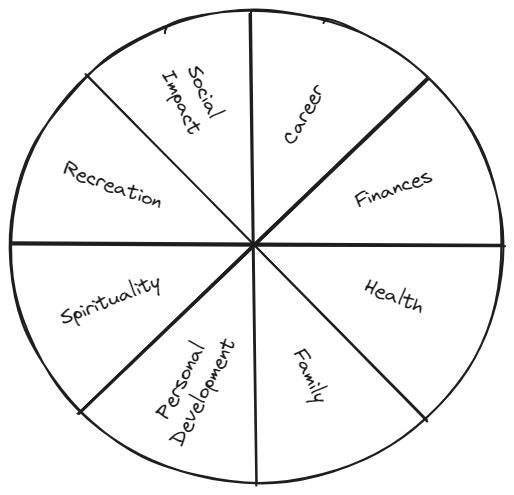
The example above shows the most common areas of life, however the areas are different for everyone, e.g. some people may not be interested in spirituality or it is not important for them. That's why I'll provide some guidelines to discover your individual areas of life:
Self-Reflection:
Take time for introspection. Consider what aspects of your life are most important to you. Ask yourself questions like: What brings me joy? What challenges do I currently face? What areas do I want to improve? This process can help you identify key life dimensions.
Personal Values:
Reflect on your values. What principles and beliefs guide your decisions and actions? Your values often align with specific life areas. For example, if family is crucial to you, the "Family and Relationships" dimension may be significant.
Roles:
Think of your different roles you have in life like parent, partner, manager, friend, etc. and determine which of these roles are important in your life.
Use The Wheel of Life
Now that you discovered the important areas of your life, draw a circle and divide it into equal segments, one for each area. Then for each area, ask yourself how satisfied you are with the respective area. Do your actions align with your values? Do you feel fulfilled in this area? Color each area accordingly, a blank area means you are not fulfilled at all and your actions don't align with your values, and a fully colored area means that you are aligned with your values and feel fulfilled.
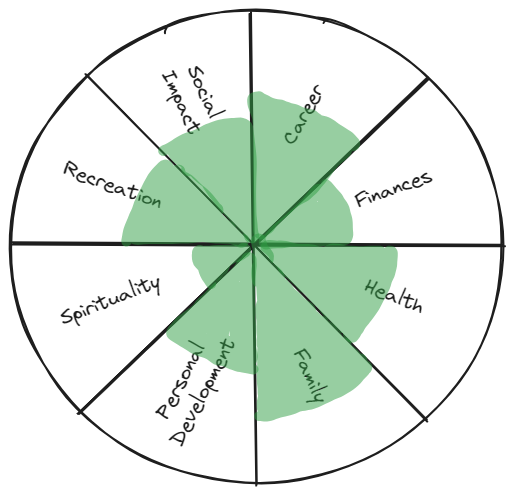
Take a look at your completed wheel, it will give you a visual representation of how balanced or imbalanced your life is across the different areas. Identify in which areas you are least aligned, these are your areas for improvement. Think about what you need to do to bring back the balance in your life. That's where setting goals, and respective projects/tasks come into play. You need to take action to get your balance back!
Obsidian Setup
Homebase
The Homebase is your landing page for your Life OS. It contains links to the different dashboards like the projects dashboard or the areas dashboard, quick links to often used notes and some statistics about your vault. You can customize this however you like it and add as many links as you need.
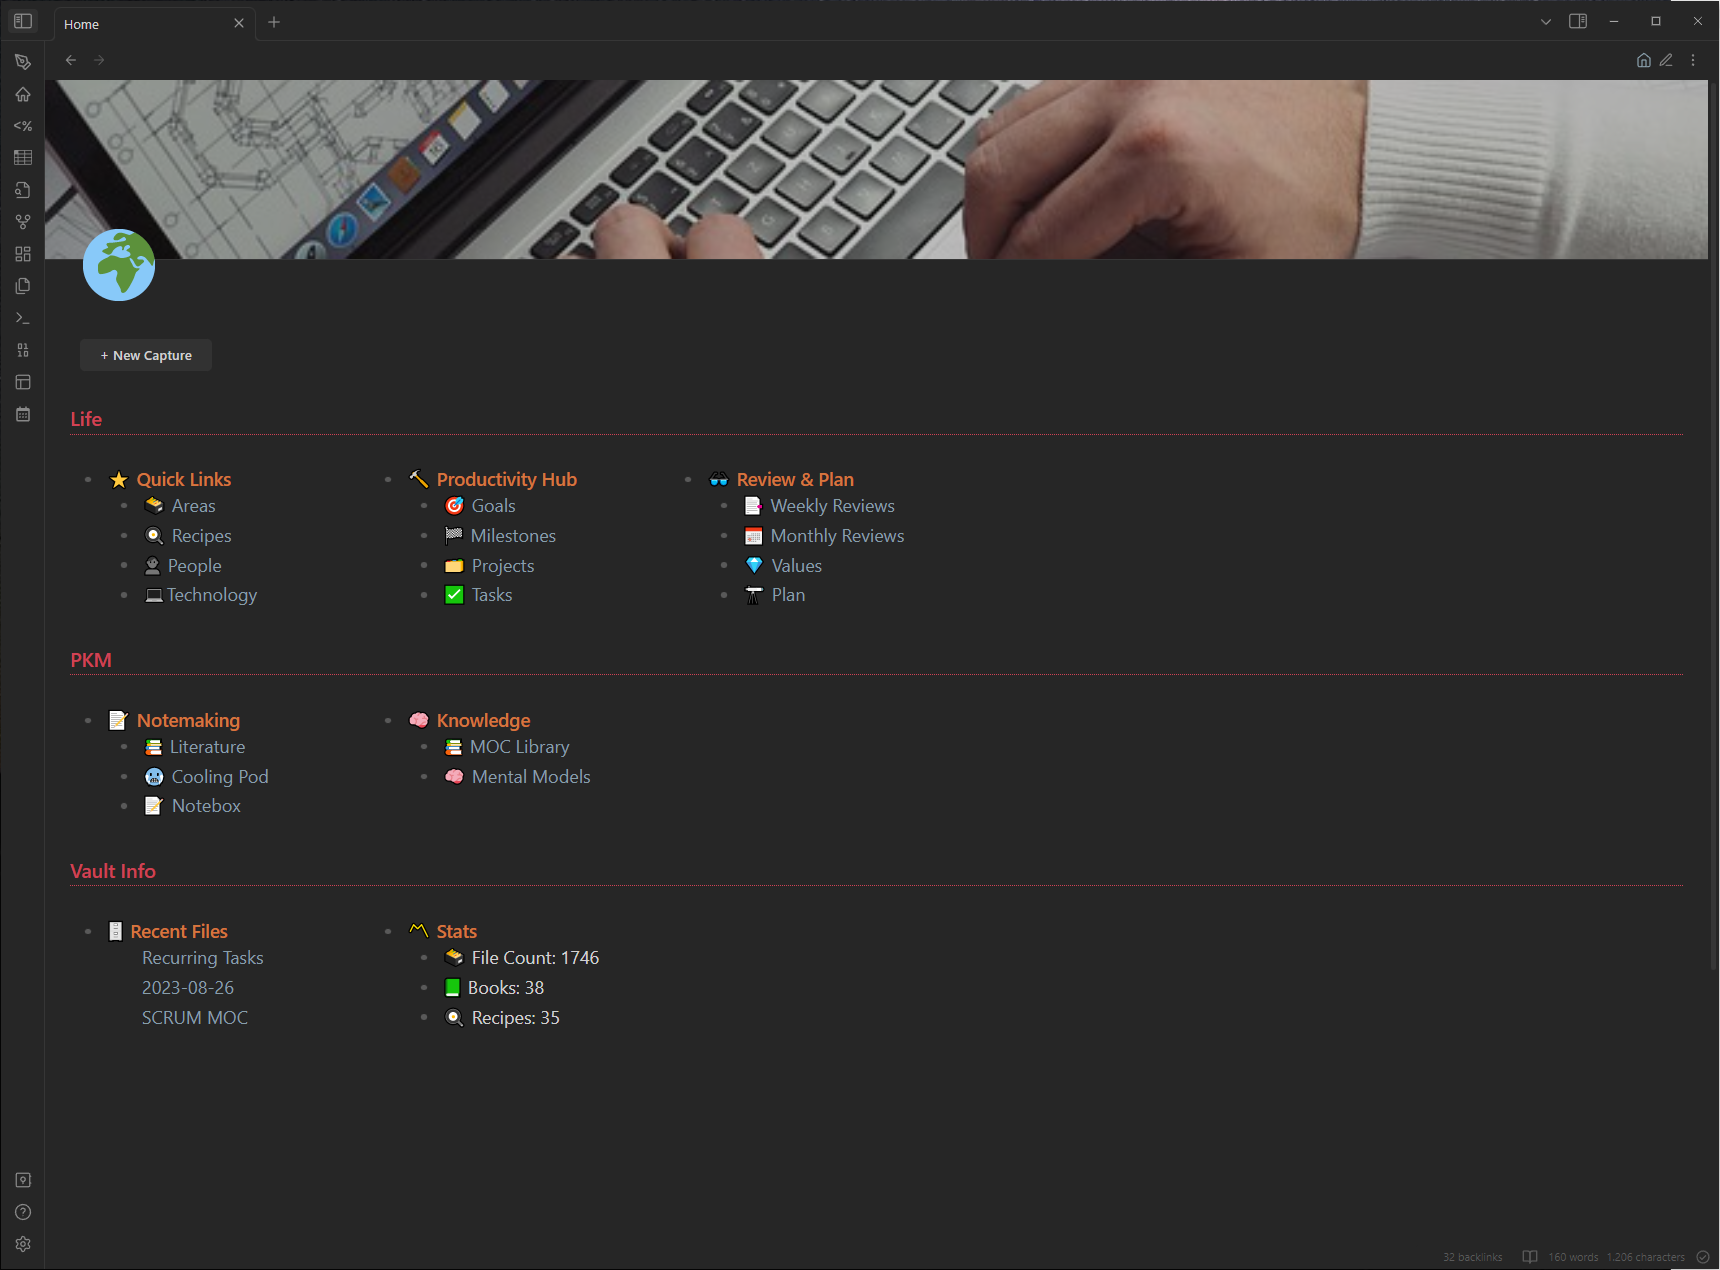
The inspiration comes from TfTHacker -> https://github.com/TfTHacker/DashboardPlusPlus
To get this styling for the dashboard, we need so called snippets in Obsidian, which are CSS files, that allow you modifies Obsidian's look, like e.g. font color, etc.
- Download the CSS file dashboard.css
- Copy the file into your Obsidian vault in the folder .obsidian/snippets
- Enable the snippet by going to Settings -> Appearance and scroll down to the bottom to toggle the snippet
- Create a file called Home in the root folder of your vault and add the below content
Code
---
cssclass: dashboard
banner: "![[home-banner.jpg]]"
banner_icon: 🌍
---
<br>

# Life
- ## ⭐ Quick Links
	- [[Areas 🗃️|🗃️ Areas]]
	- [[Recipes MOC|🍳 Recipes]]
	- [[People MOC 👤|👤 People]]
	- [[Technology MOC 💻|💻Technology]]
- ## 🔨 Productivity Hub
	- [[Goals 🎯|🎯 Goals]]
	- [[Milestones 🏁|🏁 Milestones]]
	- [[Projects 🗂️|🗂️ Projects]]
	- [[Tasks - Timeline ✔️|✅ Tasks]]
- ## 👓 Review & Plan
	- [[Weekly Review 📑|📑 Weekly Reviews]]
	- [[Monthly Review 📆|📅 Monthly Reviews]]
	- [[Values 💎|💎 Values]]
	- [[Plan - This Quarter 🔭|🔭 Plan]]

 # PKM
- ## 📝 Notemaking
	- [[Literature 📚|📚 Literature]]
	- [[Cooling Pod ❄️|🥶 Cooling Pod]]
	- [[Notebox 📝|📝 Notebox]]
 - ## 🧠 Knowledge
	- [[MOC Library 📚|📚 MOC Library]]
	- [[Mental Models MOC 🧠|🧠 Mental Models]]

# Vault Info
- ## 🗄️ Recent Files
 `$=dv.list(dv.pages('').sort(f=>f.file.mtime.ts,"desc").limit(3).file.link)`
- ## 〽️ Stats
	-  🗃️ File Count: `$=dv.pages().length`
	-  📗 Books: `$=dv.pages('#sources/book AND !"999 Templates"').length`
	-  🍳 Recipes: `$=dv.pages('#topic/cooking/recipe AND !"999 Templates"').length`
Areas - Dashboard
Now we create a landing page to access the different areas.
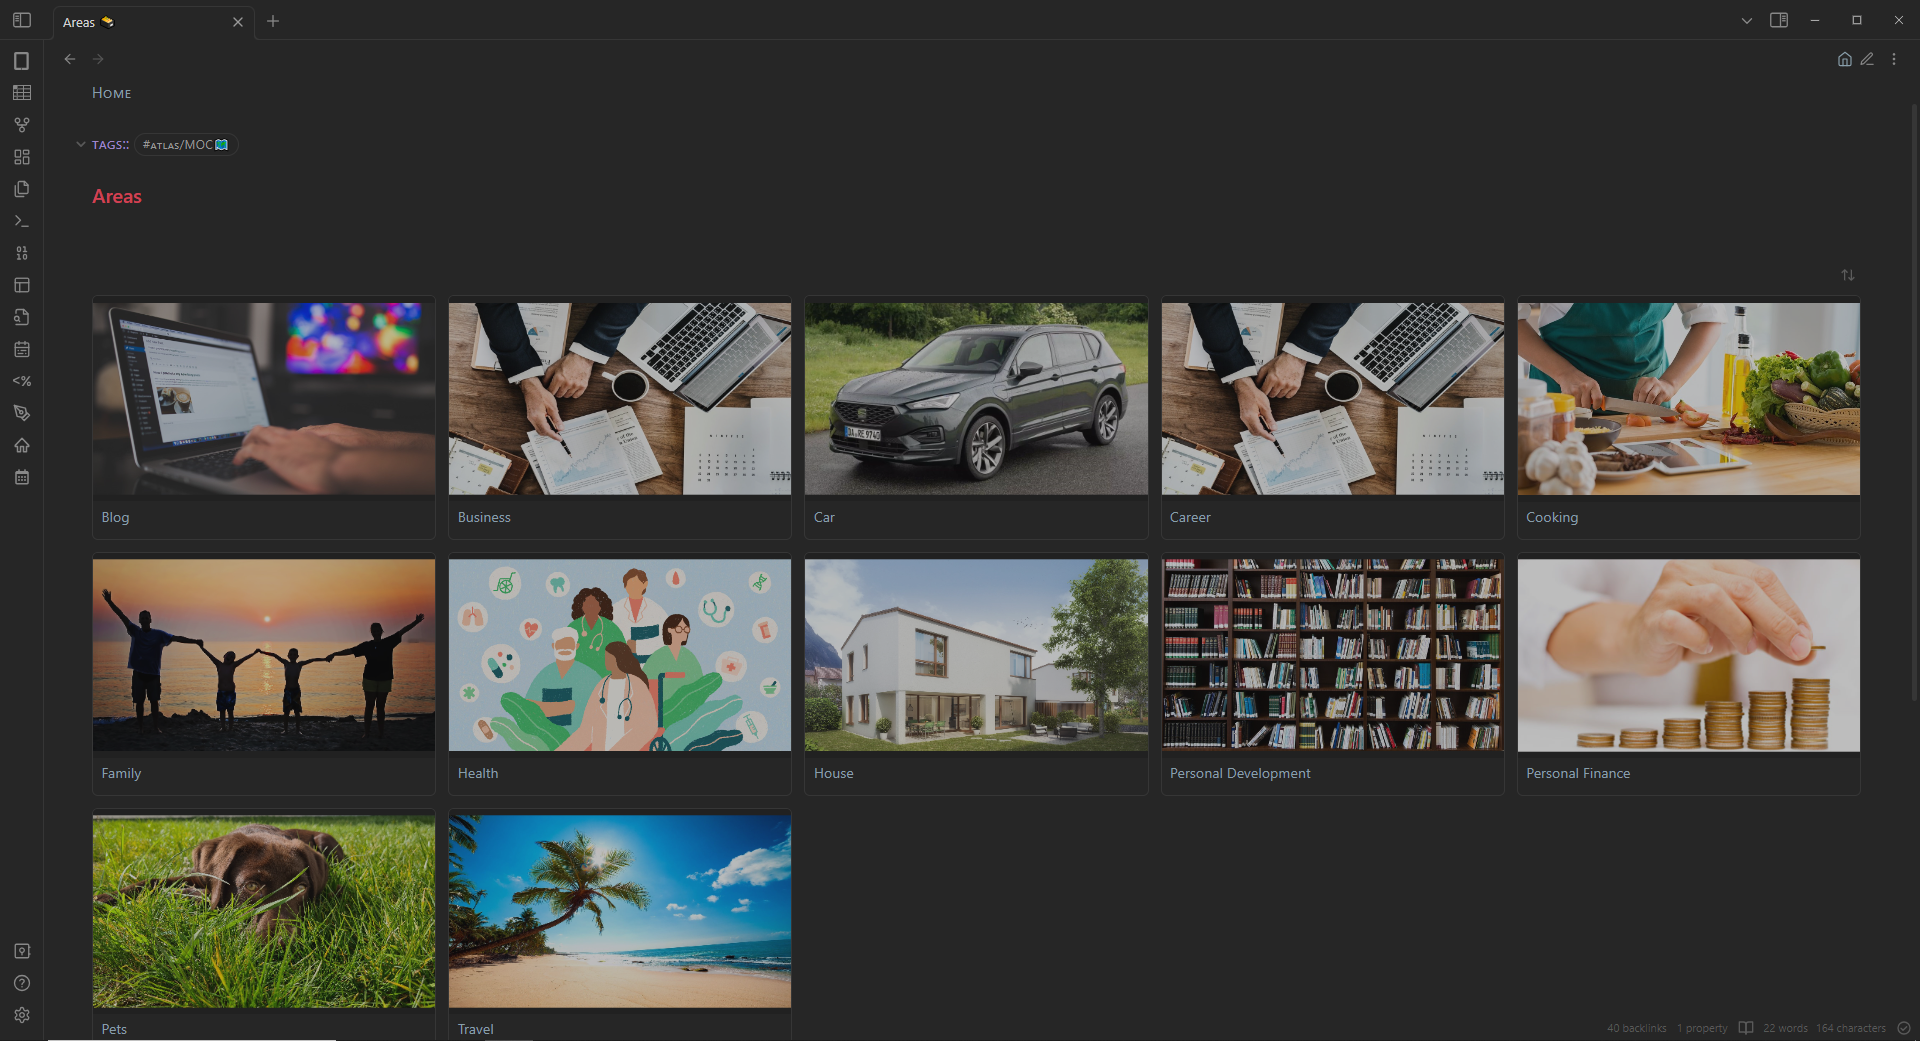
Create a file called Areas 🗃️ in the folder 5 Life/Areas and add the following content:
Code
---
cssClasses: cards, cards-align-bottom, cards-cols-4
---
###### [[Home]]
# Areas
```button
name + New Area
type command
action QuickAdd: Add Area
```

```dataview
TABLE without ID
	banner,
	file.link
FROM #life/area AND !"999 Templates"
SORT file.name ASC
```
Areas - Template
Next we create the template to be used for any new area we add to the system:
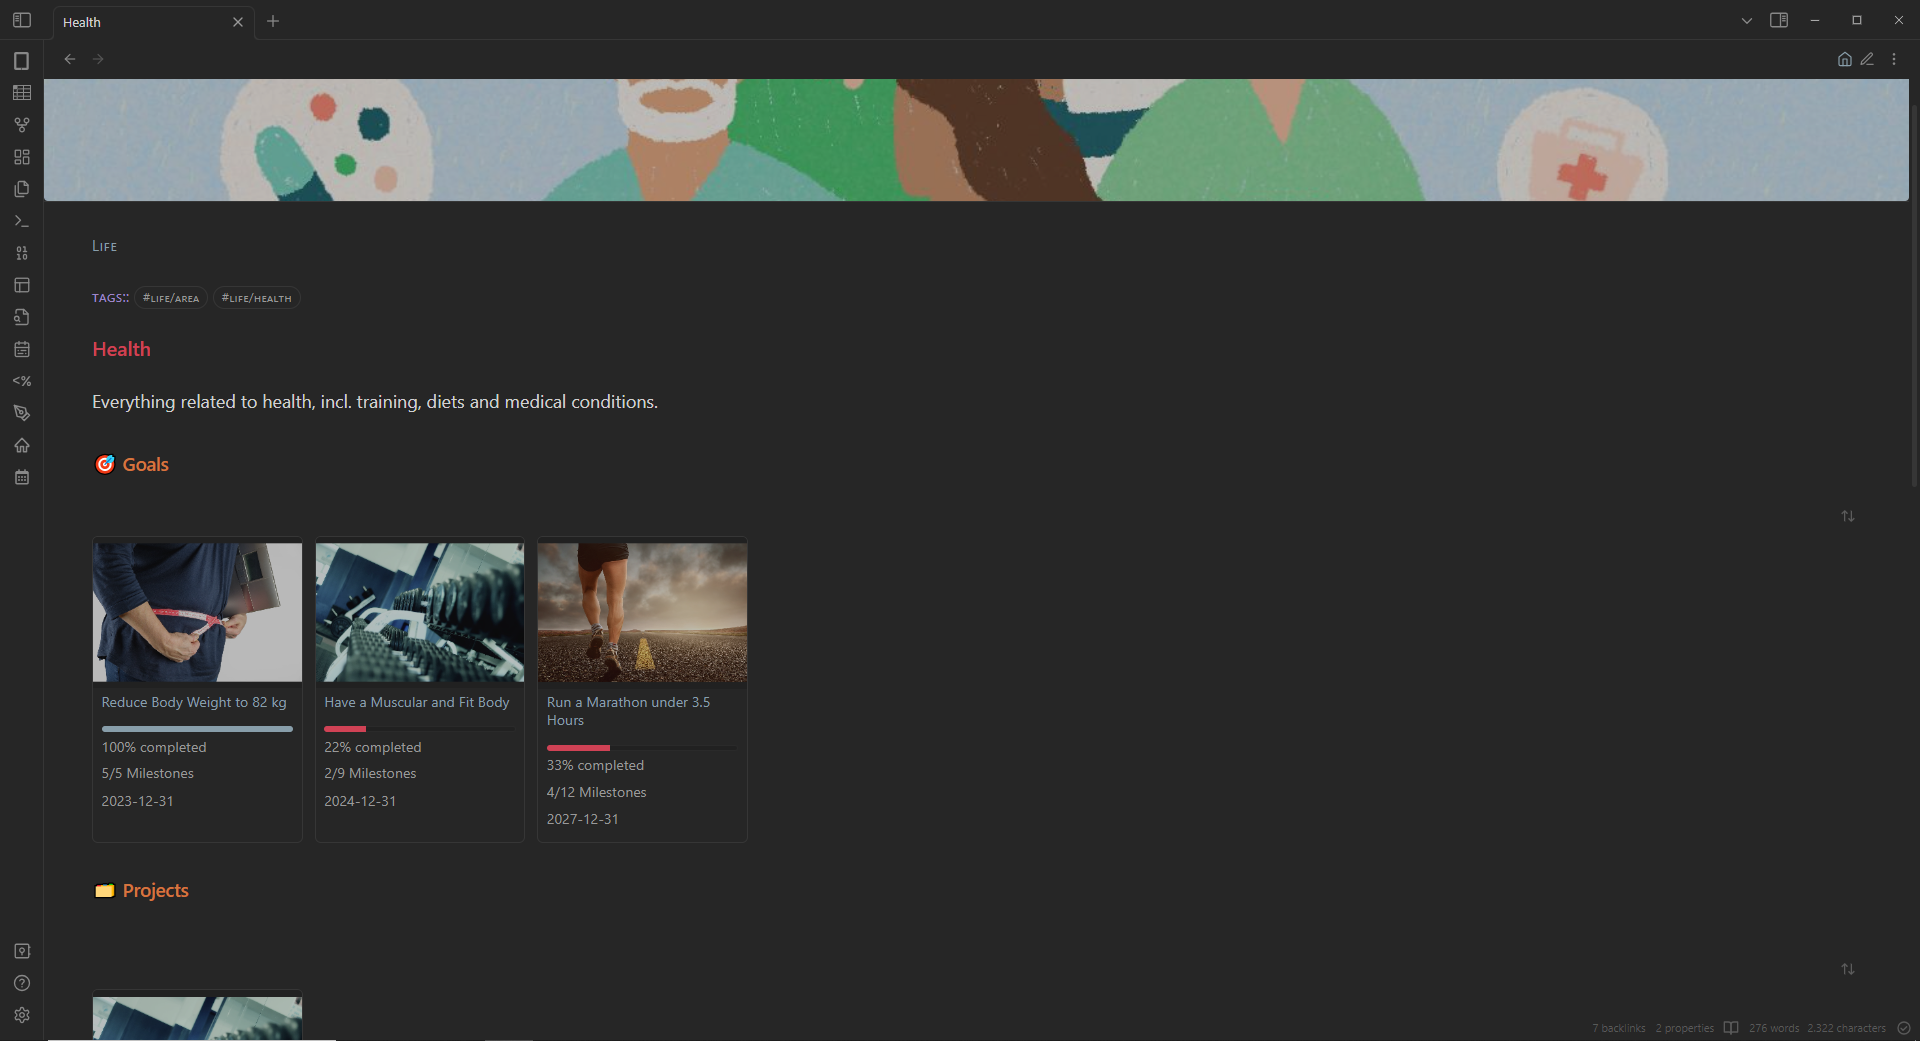
Each area will show any goals and projects that are linked to this area, to get a quick and easy overview of your efforts in this area. Afterwards feel free to add as many relevant information, links, etc. to the area page as you want. The area page should act as a landing page to this area of your life. E.g. your health area may contain links to workouts or your medical conditions, or your career area could have a link to your CV and a history of your salary progression.
Create a file called Area Template in the folder 999 Templates and add the following content:
Code
---
banner: "![[areas-banner.jpg]]"
cssClass: cards, cards-cols-4
---
###### [[Areas 🗃️|Areas]]
###### tags:: #life/area
# <% tp.file.title %>
## 🎯 Goals
```dataviewjs
function getMilestonePages(goalName) {
var files = dv.pages('#life/milestone')
var goal = dv.page(goalName).file.link
return files.where(p => String(p.goal) == String(goal))
}
function getMilestonesTotal(milestonePages) {
return milestonePages.length
}
function getMilestonesDone(milestonePages) {
return milestonePages.where(p => p.completeddate != "In Progress").length
}
function getProgress(milestonePages) {
var milestonesTotal = getMilestonesTotal(milestonePages)
var milestonesDone = getMilestonesDone(milestonePages)
var progress = Math.round(milestonesDone / milestonesTotal * 100)
var l = ""
return "<progress value='" + progress + "' max='100'></progress>" + "<br>" + progress + "% completed"
}
let pages = dv.pages('#life/goal and "5 Life"').where(p => String(p.area) == String(dv.current().file.link))
dv.table(["Banner", "🎯 Goal", "📈 Progress", "🏁 Milestones", "📆 Deadline"],
pages
.sort(p => p.deadline, 'asc')
.map(p => [
p.banner,
p.file.link,
getProgress(getMilestonePages(p.file.name)),
getMilestonesDone(getMilestonePages(p.file.name)) + "/" + getMilestonesTotal(getMilestonePages(p.file.name)) + " Milestones",
p.deadline
])
)
```
## 🗂️ Projects
```dataview
TABLE without ID
banner,
file.link AS " 🗂 Name",
"<progress value='" + (length(filter(file.tasks.completed, (t) => t = true)) / length(file.tasks)) * 100 + "' max='100'></progress>" + "<br>" + round((length(filter(file.tasks.completed, (t) => t = true)) / length(file.tasks)) * 100) + "% completed"
AS "📈 Progress",
length(filter(file.tasks.completed, (t) => t = true)) + "/" + length(file.tasks) + " Tasks" AS "✅ Tasks",
dateformat(deadline,"d MMMM, yyyy") AS "📅 Deadline"
FROM #project/personal AND "5 Life"
WHERE area = this.file.link
SORT completeddate ASC, deadline ASC
```Areas - Quick Add Button
Now we configure a macro with the QuickAdd plugin. This macro will be called from the button in the areas dashboard and will use the template defined above to create new projects.
Stay Tuned
Coming next in the series is the article about the Daily Notes and Journaling.